Mono-Red Dredge Deck Tech & Sideboard Guide

Pauper in Magic: The Gathering is a format full of surprises, where off-meta decks and creative brews can go toe-to-toe with the best in the meta. Today, we’re diving into a deck that has been making waves since the release of Modern Horizons 3: Mono-red Dredge. This graveyard-fueled strategy takes advantage of madness, unearth, and powerful discard synergies to create explosive turns and overwhelming board states. In this guide, I’ll break down the Mono-red Dredge MTG Pauper decklist, its overall strategy, and a sideboard guide to help you navigate the meta. Let’s get started!
Table of Contents
Mono-red Dredge Pauper Deck Overview


Mono-red Dredge is one of those decks that looks like complete chaos at first glance but plays out like a well-oiled machine once you see it in action. Unlike traditional red decks focusing on burn spells or small aggressive creatures, this deck has a different game plan. It’s all about discarding cards, filling up the graveyard, and bringing creatures back for free through mechanics like madness, unearth, and recursion spells.
Best Card Choices for Mono-red Dredge in Pauper
The deck runs a lot of creatures that either cost nothing to cast under the right conditions or come back from the graveyard when you need them.
The Creatures
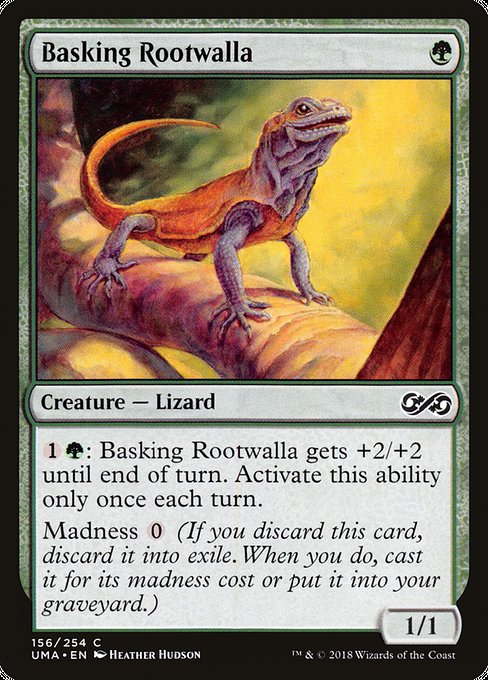
[cards]{{Basking Rootwalla}}[/cards]
[card]Basking Rootwalla[/card] is a perfect example—it has a madness cost of zero, meaning if you discard it, you can throw it directly onto the battlefield for free. That kind of efficiency is what makes the deck tick.
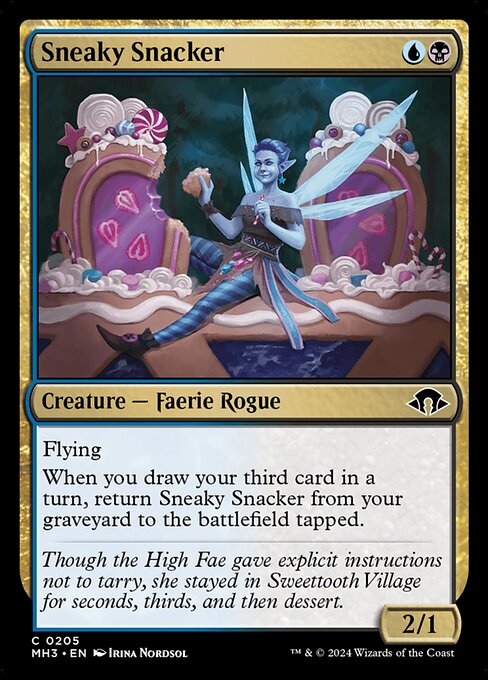
[cards]{{Sneaky Snacker}}[/cards]
Then there’s [card]Sneaky Snacker[/card], which sneaks its way back onto the battlefield as long as you’ve drawn three cards in a turn. Since this deck is constantly looting, drawing, and discarding, you’ll often meet that requirement without even trying.
[cards]{{Scrapwork Mutt}}[/cards]
[card]Scrapwork Mutt[/card] helps smooth out your draws, letting you discard a card to draw a new one when it enters, and thanks to its unearth ability, you can bring it back for another round of card filtering.
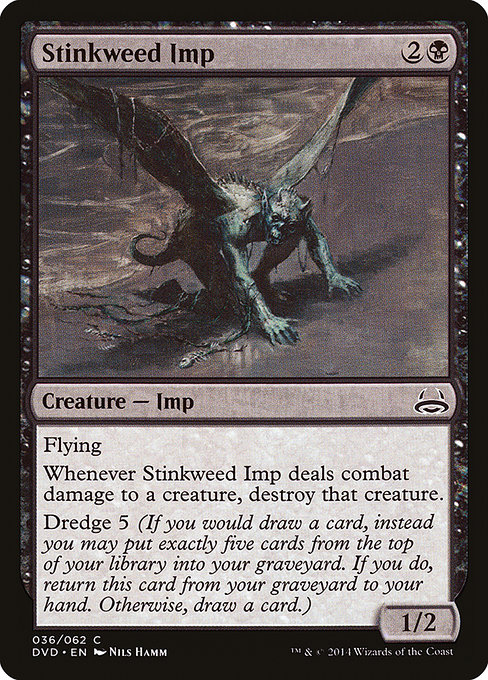
[cards]{{Stinkweed Imp}}[/cards]
[card]Stinkweed Imp[/card] is a crucial piece of the puzzle, not because it’s a great blocker (though it is), but because it has dredge 5. Every time you choose to dredge instead of drawing a card, you mill five cards from your library—instantly fueling your graveyard for later.
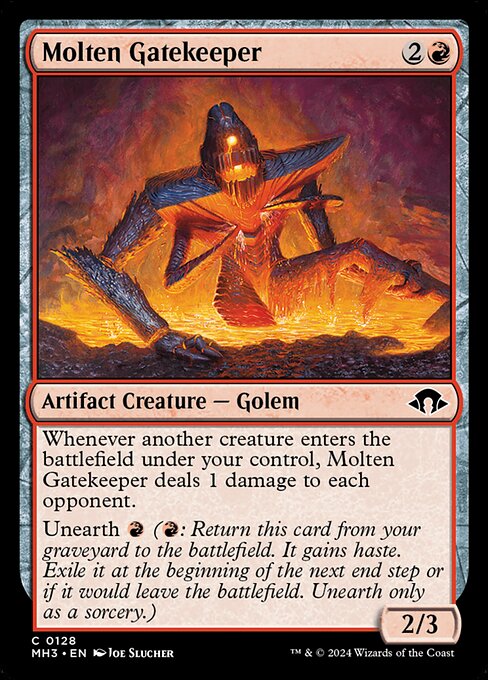
[cards]{{Molten Gatekeeper}}[/cards]
And finally, there’s [card]Molten Gatekeeper[/card], a creature that rewards you every time something new enters the battlefield. Each time a creature enters under your control, it pings your opponent for one damage, which adds up quickly when you’re bringing multiple creatures back at once with unearth or madness.
The Discard Package
To get this deck going, you need to be discarding constantly. That’s where cards like [card]Faithless Looting[/card] come in.
[cards]{{Faithless Looting}}[/cards]
For just one red mana, you get to draw two cards and then discard two—a perfect way to set up madness creatures or load up the graveyard for recursion later. And since it has flashback, you can do it all over again from the graveyard.
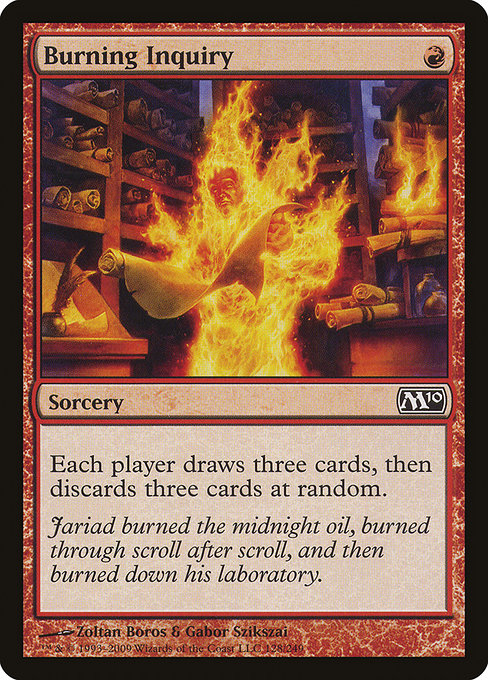
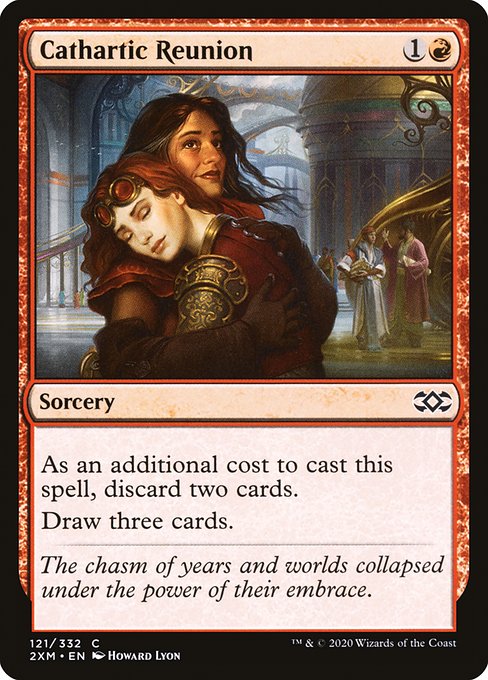
[cards]{{Cathartic Reunion}}{{Burning Inquiry}}[/cards]
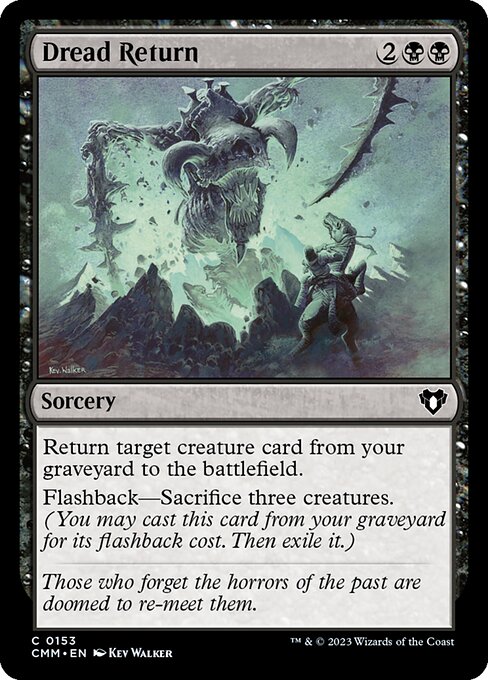
[card]Cathartic Reunion[/card] is another solid looting spell, letting you discard two and then draw three. The extra card makes a big difference, especially when you’re trying to dig for key pieces like [card]Dread Return[/card].
Then there’s [card]Burning Inquiry[/card], which is both amazing and risky. Each player draws three and then discards three at random. Sometimes this works out perfectly, putting the exact cards you need into your graveyard. Other times, it can be a little unpredictable. But in a deck like this, rolling the dice is part of the fun.
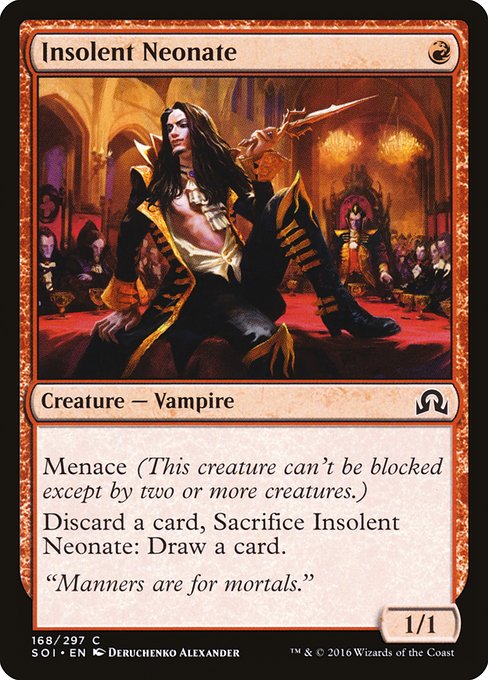
[cards]{{Insolent Neonate}}[/cards]
[card]Insolent Neonate[/card] adds another layer of discard synergy. It’s a one-drop with menace, but more importantly, you can sacrifice it to discard a card and immediately draw a new one. It’s cheap, effective, and sets up madness or dredge plays effortlessly.
The Win Condition
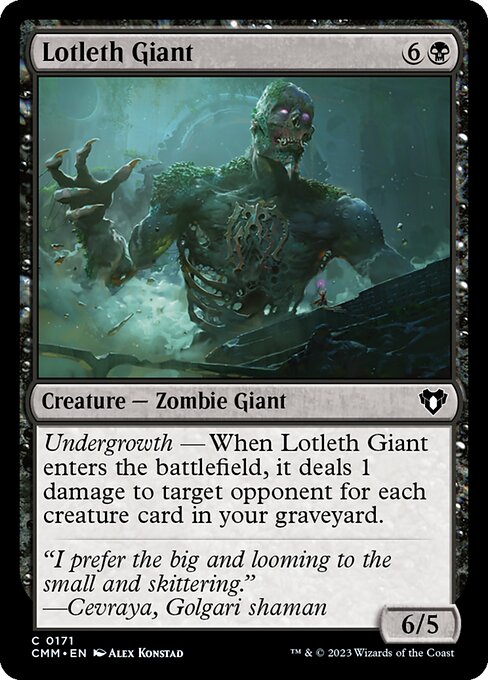
[cards]{{Lotleth Giant}}[/cards]
This deck isn’t looking to win by attacking turn after turn. Instead, it’s building toward a massive, game-ending swing, and that’s where [card]Lotleth Giant[/card] comes in. This zombie giant doesn’t care about the battlefield—it only cares about how many creatures are in your graveyard. When it enters, it deals damage equal to the number of creature cards in your graveyard straight to your opponent’s face. With enough setup, that’s often enough to win the game on the spot.
The Strategy
Alright, so the way this deck plays out is pretty straightforward once you get the hang of it. Early on, your main goal is to load up the graveyard as fast as possible.
[cards]{{Faithless Looting}}{{Cathartic Reunion}}[/cards]
You’re casting looting spells like [card]Faithless Looting[/card] and [card]Cathartic Reunion[/card] to dig through your deck while pitching creatures that you can bring back later. If you’ve got [card]Stinkweed Imp[/card] in the graveyard, you can dredge it instead of drawing, milling five cards at a time, which speeds things up a lot. And if you really want to go wild, [card]Burning Inquiry[/card] can randomly toss a bunch of creatures into the graveyard while drawing you deeper into your deck. It’s a little chaotic, but that’s part of the fun.
[cards]{{Basking Rootwalla}}{{Sneaky Snacker}}[/cards]
Once you’ve got a decent graveyard set up, it’s time to start applying pressure. This is where all the free or recurring creatures come in. [card]Basking Rootwalla[/card] is great because you can just drop it for free when you discard it, and [card]Sneaky Snacker[/card] sneaks back onto the battlefield if you’ve drawn three cards in a turn—which happens all the time in this deck.
[cards]{{Scrapwork Mutt}}{{Molten Gatekeeper}}[/cards]
Then there’s the unearth creatures like [card]Scrapwork Mutt[/card] and [card]Molten Gatekeeper[/card], which pop back for a turn to get some extra value. [card]Molten Gatekeeper[/card] in particular is a beast because it pings your opponent every time something enters the battlefield under your control, meaning you can rack up a bunch of damage without even attacking.
[cards]{{Lotleth Giant}}{{Dread Return}}[/cards]
The endgame is all about slamming [card]Lotleth Giant[/card] onto the battlefield and letting it do the rest. You’re never paying seven mana for this thing—you’re bringing it back with [card]Dread Return[/card] by sacrificing a few creatures you don’t need anymore. If your opponent is packing graveyard hate, no big deal—you can pivot to a backup plan letting [card]Molten Gatekeeper[/card] finish them off with direct damage triggers. Either way, once this deck gets going, it’s hard to stop.
Optimizing Your Mono-red Dredge Sideboard
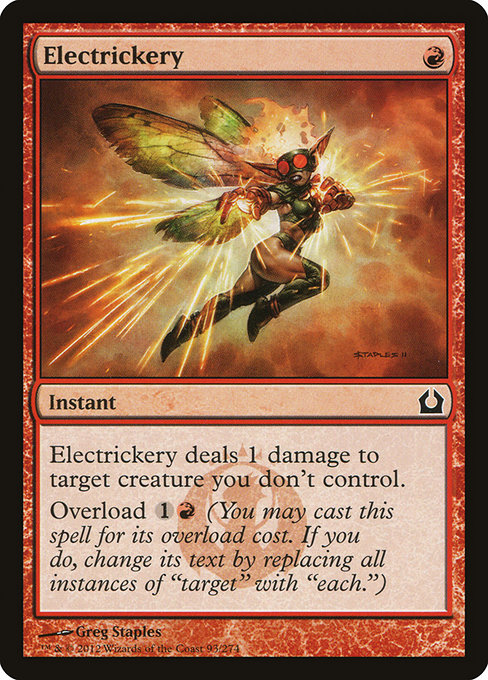
[cards]{{Electrickery}}[/cards]
[card]Electrickery[/card] is your best tool against go-wide strategies like Faeries, Elves, and Boros decks that rely on a bunch of small creatures. While a single point of damage might not seem like much, the ability to overload it and hit everything your opponent controls makes it a great way to clear out boards full of 1-toughness creatures. Even when it’s not overloaded, it can still pick off a key creature at instant speed, making it a flexible removal option.
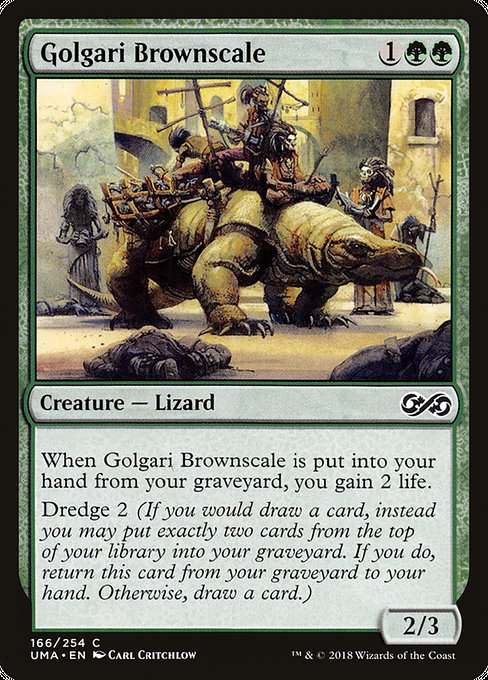
[cards]{{Golgari Brownscale}}[/cards]
[card]Golgari Brownscale[/card] might seem like an odd choice, but it’s actually a sneaky way to fight against burn decks and aggressive strategies. The dredge ability means you’re milling even more cards while constantly gaining two life every time you bring it back to your hand. Against decks like Mono-red Burn, every bit of life gain matters, and if you can keep cycling this in and out of the graveyard, you can create a steady stream of life gain while fueling your primary game plan. It’s slow, but in the right matchup, it’s exactly what you need to stabilize.
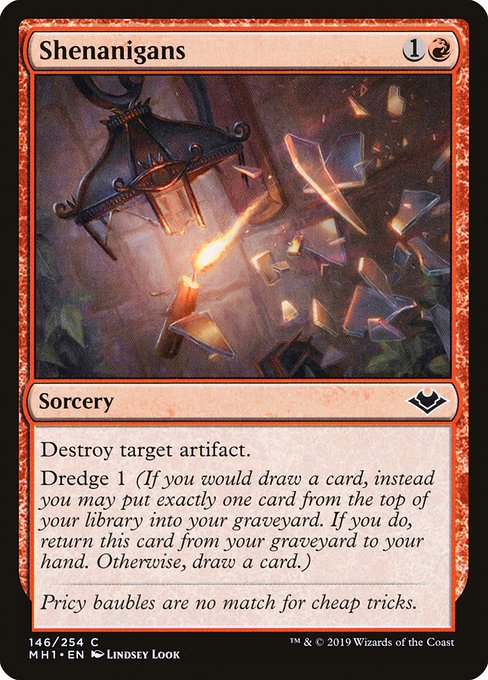
[cards]{{Shenanigans}}[/cards]
[card]Shenanigans[/card] is the perfect answer to artifact-heavy decks, and what makes it so strong is the dredge ability. Instead of being a one-time removal spell like [card]Abrade[/card], this keeps coming back over and over again. If your opponent is running something like [card]Relic of Progenitus[/card] or [card]Nihil Spellbomb[/card]—both of which can exile your graveyard and ruin your game plan—you’ll want a way to remove them before they become a problem. Being able to repeatedly dredge [card]Shenanigans[/card] means you can always have it when you need it, making it one of the most reliable anti-artifact options available.
[cards]{{Flaring Pain}}[/cards]
[card]Flaring Pain[/card] is here for one reason: to get around damage prevention effects. Some decks run cards like [card]Prismatic Strands[/card] to completely blank a turn’s worth of damage, which is a huge problem when you’re trying to land a lethal [card]Lotleth Giant[/card] trigger. With [card]Flaring Pain[/card], you don’t have to worry about that—it completely shuts down damage prevention, ensuring your burn or combat damage goes through. And since it has flashback, even if your opponent counters or discards it, you still have another shot at using it when the time is right.
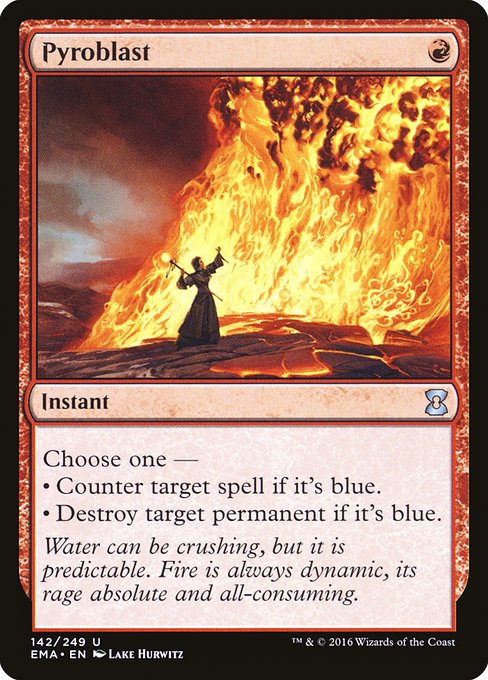
[cards]{{Pyroblast}}[/cards]
[card]Pyroblast[/card] is an all-star against blue decks, especially control strategies that try to stop your key spells with counterspells. It’s also useful against blue creatures, since it can destroy them outright, making it a great tool against Delver or other tempo decks that rely on evasive threats.
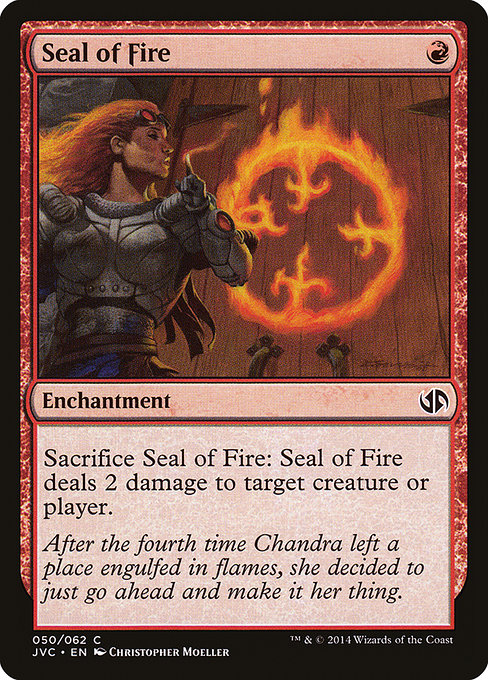
[cards]{{Seal of Fire}}[/cards]
Lastly, [card]Seal of Fire[/card] is a sneaky but effective removal spell that plays perfectly into Mono-red Dredge’s game plan. Since it’s an enchantment that stays on the battlefield until you need it, you can drop it early and leave it up as a threat against small creatures.
Tips and Tricks for Playing Mono-red Dredge in Pauper
Discard effects like [card]Faithless Looting[/card] usually put you down one card behind, and with its flashback cost you get card equity. To get value from them, is a must to pair it with madness payoffs or [card]Sneaky Snacker[/card]. The same applies with [card]Burning Inquiry[/card].
[card]Scrapwork Mutt[/card] pairs very good with [card]Stinkweed Imp[/card] as you discard first and draw second, meaning that you can fill your graveyard with just discarding the Imp first and returning it to hadn due to its Dredge ability.
Similarly, [card]Cathartic Reunion[/card] can be used with [card]Stinkweed Imp[/card] but is also usually paired with [card]Sneaky Snacker[/card] to bring it back for free.
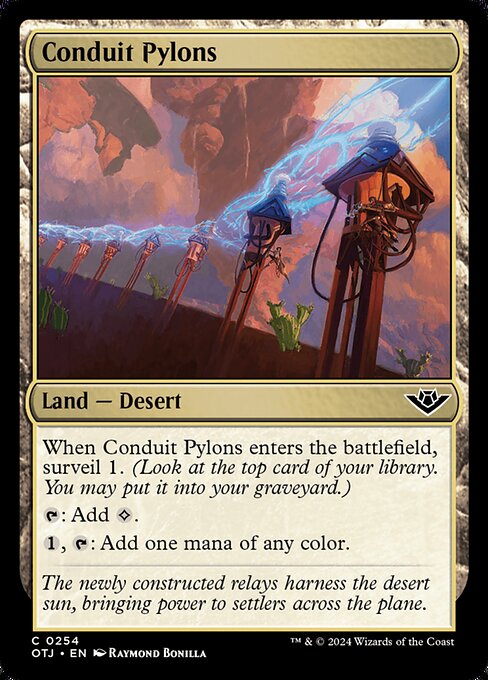
Remember that your [card]Conduit Pylons[/card] can pump your [card]Basking Rootwalla[/card], so don’t overlook this opportunity for dealing extra damage.
Mono-red Dredge Pauper Sideboard Guide
The following are suggestions on how to approach games with the deck, though they clearly reflect my own preferences based on my personal experience with the deck, so you’ll notice some different recommendations here than what you might be used to.
Mono Red Aggro
IN: 3 [card]Golgari Brownscale[/card], 3 [card]Electrickery[/card], 1 [card]Shenanigans[/card]
OUT: 2 [card]Insolent Neonate[/card], 4 [card]Basking Rootwalla[/card], 1 [card]Molten Gatekeeper[/card]
Since Mono-red is an aggressive match, I don’t see [card]Basking Rootwalla[/card] doing a great job at blocking, so cutting them is essentially right. From there, we just transition to a slower plan where Brownscale loops will be key to staying alive and buying you time while you setup your [card]Dread Return[/card] win condition. The single Shenanigans is fine against mono red due to the artifact hate they may run, and in some cases, you can even get rid a key artifact to turn off their [card]Goblin Tomb Raider[/card].
Grixis Affinity
IN: 4 [card]Shennanigans[/card]
OUT: 1 [card]Dread Return[/card], 2 [card]Insolent Neonate[/card], 1 [card]Lotleth Giant[/card]
Affinity relies heavily on artifact synergies, and [card]Shenanigans[/card] is the perfect recurring answer.
Dimir Faeries
IN: 3 [card]Electrickery[/card], 2 [card]Pyroblast[/card]
OUT: 2 [card]Insolent Neonate[/card], 2 [card]Voldaren Epicure[/card], 1[card]Burning Inquiry[/card]
Faeries is all about small creatures and counterspells, so [card]Electrickery[/card] is an easy way to wipe their board, especially if they rely on Spellstutter Sprite chains. [card]Pyroblast[/card] helps protect your key spells from counter magic and can remove [card]Mulldrifter[/card] or [card]Tolarian Terror[/card] if needed.
Dimir Terror
IN: 2 [card]Pyroblast[/card]
OUT: 2 [card]Insolent Neonate[/card]
Dimir Terror is all about big creatures and counterspells, and [card]Pyroblast[/card] gives you the best tool to fight back. It can counter their interaction or remove a [card]Tolarian Terror[/card] outright. Since
The Boros version
Around the same time, this deck got popularized, I also came up with a Boros version that relied on a similar idea, and is just as explosive!
Wrap Up
As you can see, Mono-red Dredge is an unconventional deck that can be both explosive and fun to play with!
Which deck should I do a deck tech for? Let me know in the comments!
Thanks for reading.
If you’d like to support the blog and my YouTube channel, you can do so for just $1 a month on Ko-fi or through YouTube memberships. That gets you access to our Discord community and behind-the-scenes content — and it helps me keep creating more Pauper content for you all.
My Favorite Pauper Setup
Here are some of my favorite MTG products for Pauper—stuff I’ve tried, loved, and think you'll find super useful too.


The Amazon links use affiliate codes that help support future content if you grab something.
.jpg)

.jpg)
.png)
.webp)
.webp)
.jpg)
.jpg)
.png)
Comments
Post a Comment